Learn ABB Robot Programming Fundamentals Online
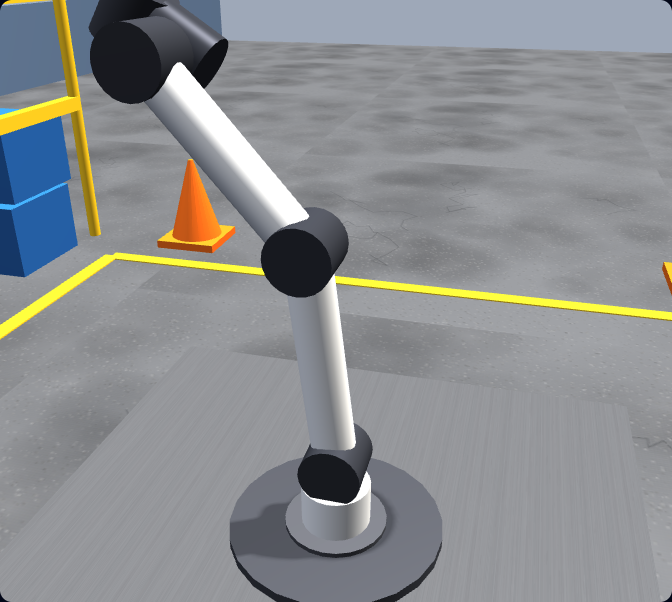
ABB robots are programmed in RAPID, taught on the FlexPendant, and simulated offline in RobotStudio. Before you wrestle with vendor-specific syntax, master the universal fundamentals — frames, the tool centre point, joint vs linear motion, I/O, pick-and-place, payload, and safety — hands-on in a free browser simulator. These concepts carry straight onto an ABB FlexPendant and into RAPID.
Honest note: this is not an ABB emulator and it does not run ABB RAPID. It teaches the transferable robot-programming fundamentals using real URScript on a UR-style arm.
The ABB stack
How ABB robots are actually programmed
ABB is one of the world’s largest industrial-robot manufacturers, and its programming workflow is built around a few core tools. Knowing what each one does — and what it expects you to already understand — tells you exactly where to start.
RAPID — ABB’s programming language
Day-to-day ABB programming is written in RAPID, ABB’s high-level robot language. A RAPID program is organised into modules and routines and built from motion instructions (MoveJ for joint moves, MoveL for linear moves), I/O instructions like SetDO, and standard control flow. RAPID is the bread-and-butter of real ABB work.
The FlexPendant teach pendant
The FlexPendant is ABB’s handheld touchscreen teach pendant. You use it to jog the arm, record target positions, edit RAPID routines, and run programs at the cell. Teaching accurate targets and understanding frames on the pendant is a core everyday skill.
RobotStudio for offline programming
RobotStudio is ABB’s official PC-based offline-programming and simulation suite. It builds a 3D model of your robot and cell so you can write, test, and optimise RAPID programs before touching the real machine. It is ABB-specific — the standard tool for serious ABB cell design.
GoFa & SWIFTI collaborative robots
ABB’s GoFa and SWIFTI are collaborative robots (cobots) designed to work safely near people. They support easier setup methods such as lead-through (hand-guidance) programming alongside RAPID — but the same fundamentals of frames, motion, payload, and force-limited safety still apply.
ABB also offers easier on-ramps alongside RAPID: Wizard Easy Programming, a graphical block-based interface on OmniCore controllers; lead-through (hand-guidance) on the GoFa and SWIFTI cobots; and Externally Guided Motion (EGM) for streaming positions from an external controller. They all sit on top of the same motion and I/O fundamentals.
Reading RAPID code
RAPID program structure and the anatomy of a MoveL
A RAPID program is organised into modules, and each module holds routines. Execution starts in a procedure called main. A minimal skeleton looks like this:
MODULE MainModule
    PROC main()
        MoveJ pHome, v1000, z50, tool0;
        MoveL p10, v500, fine, tool0\WObj:=wobj1;
        SetDO doGripper, 1;
    ENDPROC
ENDMODULE
Almost every line of RAPID motion follows one template. Once you can read it, RAPID stops looking like a wall of codes. Take the linear move above:
MoveL p10, v500, fine, tool0;Instruction — MoveL linear, MoveJ joint, or MoveC circular. This is exactly the joint-vs-linear decision you practise here with movej and movel; RAPID adds a circular move (MoveC) through a via point.
Target (robtarget) — p10 is a robtarget: a full pose holding the TCP position, orientation, and axis configuration. (jointtarget is the joint-angle equivalent used with MoveAbsJ.) Same idea as storing a pose/waypoint in a variable here.
Speed (speeddata) — v500 means 500 mm/s; ABB ships presets like v1000. The same velocity tuning you set per move in URScript.
Zone (zonedata) — fine stops exactly on the point; z10/z50 round the corner and carry speed into the next move — conceptually identical to the blend radius you use to smooth waypoints in the simulator.
Tool & work object — tool0 is the tooldata (your TCP), and an optional \WObj:=wobj1 selects a wobjdata (work-object frame). These are the TCP and frame setup you do here, named ABB-style.
Outputs use I/O instructions like SetDO doGripper, 1 to drive a gripper or signal a PLC — the equivalent of set_digital_out here.
What transfers
The fundamentals that carry onto an ABB arm
ABB’s RAPID language and RobotStudio are vendor-specific, but the concepts beneath them are not. Every articulated robot — ABB, FANUC, KUKA, Universal Robots — is driven by the same handful of ideas. Our browser simulator teaches each one hands-on using real URScript, so you build the mental model first and learn ABB’s RAPID syntax second.
Frames & coordinate systems
World, base, work-object, and tool frames decide where the robot thinks it is. ABB calls them work-object frames (wobj) and tool frames (tooldata); the idea is identical everywhere.
Tool Centre Point (TCP)
Define the working point of your gripper or tool so the robot moves the right spot to the right place. Get the TCP wrong and every position is off.
Joint vs linear motion
Joint moves (ABB MoveJ / URScript movej) are fast through joint space; linear moves (ABB MoveL / movel) keep the tool on a straight Cartesian line. Knowing when to use each is core to every brand.
Waypoints & sequencing
Approach, act, retract: chaining points into a smooth, safe path is the same skill on any controller.
Digital I/O & grippers
Reading inputs and setting outputs to drive a gripper or signal a PLC is universal — only the instruction names change (ABB uses SetDO).
Payload, reach & collision safety
Configure payload, respect reach limits, and avoid collisions and over-force contact. On cobots like ABB’s GoFa and SWIFTI this becomes force-limited collaborative safety.
Concept mapping
What you learn here vs what it’s called on ABB
You program in real URScript in the simulator. Here is how each concept maps to the ABB RAPID world so you can see the bridge clearly. The interface differs; the thinking is the same.
| Learned here (URScript / UR-style) | On an ABB robot (RAPID) |
|---|---|
| movej — joint move | MoveJ instruction in RAPID |
| movel — linear move | MoveL instruction in RAPID |
| Arc / circular path | MoveC (circular) instruction through a via point |
| Stored pose / waypoint variable | robtarget (Cartesian target); jointtarget for MoveAbsJ |
| Per-move speed | speeddata (e.g. v500, v1000) |
| Blend radius (smoothing waypoints) | zonedata (e.g. z10, z50); fine stops exactly on point |
| Tool centre point (set_tcp) | tooldata / tool frame setup |
| Base / feature frames | wobjdata (work-object frame) setup |
| Digital I/O (set_digital_out) | SetDO output instruction |
| Payload configuration | loaddata payload setting |
| Protective stop / force limits | SafeMove safety zones; GoFa / SWIFTI collaborative force limits |
Note: this mapping shows conceptual equivalence to help you transfer skills. The simulator does not generate or run ABB RAPID code — for that, you would use ABB’s RobotStudio or a real FlexPendant.
Where to start
ABB-specific tools vs learning the fundamentals first
You can jump straight into ABB’s ecosystem — but if you have never programmed a robot, the tools assume knowledge you do not have yet, and the licences and setup get in the way of practising. The faster path is to build the fundamentals where they are free and frictionless, then layer ABB’s RAPID syntax on top.
Jumping straight to ABB tools
RobotStudio is Windows software; a real FlexPendant means real (or rented) hardware. Both are powerful, but they assume you already understand frames, TCP, and motion types — so beginners spend their energy fighting the interface instead of learning to think like a robot programmer.
Fundamentals first, in the browser
Open a tab, write real URScript on a UR-style arm, and practise the exact concepts ABB relies on — for free, with graded tasks. When you reach a FlexPendant, you are learning RAPID syntax, not a new way of thinking.
A practical roadmap to ABB programming
- 1Build the fundamentals here: frames, TCP, joint vs linear motion, waypoints, I/O, payload, and collision/safety — graded, in the browser.
- 2Program a full pick-and-place cycle in URScript so the end-to-end workflow (approach, grasp, traverse, place, release) is second nature.
- 3Read up on ABB RAPID: how MoveJ/MoveL instructions, tooldata, wobjdata, and SetDO are structured into modules and routines.
- 4Install ABB RobotStudio (or use a real FlexPendant) and re-create a simple pick-and-place — now you are only learning ABB’s interface and RAPID syntax.
- 5Add ABB safety (SafeMove, GoFa / SWIFTI collaborative limits) once the basics are fluent.
Cobots & safety
ABB GoFa & SWIFTI cobots and collaborative safety
ABB’s GoFa and SWIFTI are collaborative robots built to operate near people without the traditional safety cage. They support easier setup methods — including lead-through (hand-guidance) programming — alongside conventional RAPID programming. That lower barrier makes cobots a common entry point into robot programming.
But collaborative does not mean consequence-free. Whatever the brand, cobot safety comes down to force and speed limits, protective stops on unexpected contact, payload that is configured correctly, and a program that avoids collisions in the first place. Our simulator teaches exactly that: tasks are graded not just on placing the part, but on staying within a force limit and avoiding over-force contact — the same discipline an ABB GoFa or SWIFTI (or any cobot) demands.
In the simulator
From first jog to a graded pick-and-place cell
You do not just watch — you write real URScript, run it on a simulated arm under physics, and get graded against a real goal. Every skill here is a fundamental ABB programmers rely on too.
Jogging & frames
Move the arm in joint and Cartesian space; understand base vs tool frames and how the TCP is defined.
Joint vs linear moves
movej vs movel — when each is right, and how speed and acceleration change the motion (the ABB MoveJ/MoveL distinction).
Digital I/O & gripper
Read and set digital signals; open and close a gripper to actually pick something up (ABB’s SetDO).
Pick-and-place A→B
Approach, grasp, lift, traverse, place, release — the backbone of real robot and cobot work.
Payload & TCP
Configure payload and tool centre point and see how they change reach, accuracy, and safe speed.
Collision & force-limited safety
Trigger and avoid protective stops and over-force contact — the heart of collaborative safety.
Prove it
From fundamentals to a shareable certificate
The free track gets you fluent in the fundamentals. The full graded path takes you from your first jog to a working pick-and-place cell and a certificate you can show an employer — useful evidence when you are stepping toward an ABB, FANUC or KUKA role.
Keep exploring
More robot programming resources
- Robot programming course — the full graded path from first jog to a working pick-and-place cell.
- FANUC robot programming — how the same fundamentals map to FANUC’s TP language and RoboGuide.
- KUKA robot programming — how the same fundamentals map to KUKA’s KRL and smartPAD.
- Universal Robots programming — learn URScript and the UR workflow our simulator is built around.
- Learn URScript — the actual language you write in our simulator; master it and the RAPID mapping above clicks into place.
- Robot programming languages compared — how ABB RAPID, FANUC TP/KAREL, KUKA KRL and URScript line up side by side.
- Yaskawa robot programming — how the fundamentals map to Yaskawa Motoman’s INFORM language and the teach pendant.
- Doosan cobot programming — the same collaborative-safety fundamentals on Doosan cobots.
- Omron robot programming — how the fundamentals carry onto Omron’s robot and cobot range.
- Robot arm simulator — practise articulated arm motion and kinematics in the browser.
- Robot simulator — the home of our browser-based robot programming trainer.
ABB robot programming FAQ
Build the fundamentals ABB programming relies on.
Write real robot code in your browser — frames, TCP, motion, I/O, pick-and-place, and safety. No install, no robot, free to start. Then take those skills to an ABB FlexPendant and RAPID.